
Sensory Play: You'll Want to Play, Too!

“Mom, I washed a dinosaur!” Fun with Soapy Water in our Dino Wash Station
One of our favorite activities at Design Hive is working with toddlers in our sensory bins. When you were growing up, you probably knew these as your water or sand tables in your preschool or Kindergarten classrooms. They may be more Pinterest-worthy today, but the concept is still the same. When it was time to go home, my mother used to have to drag me away from the water table at my preschool… no wonder it’s one of my favorites in our studio!

Simple Sensory Bin and Stand (Etsy)
Sensory Bin Set-up
You don’t need anything extravagant or costly to create a sensory bin. Any sort of container that is deep enough for a child to put their hand in, like a Tupperware or Gladware container, can work as a bin. If you’re looking for one that is a dedicated bin, I recommend looking at Etsy.
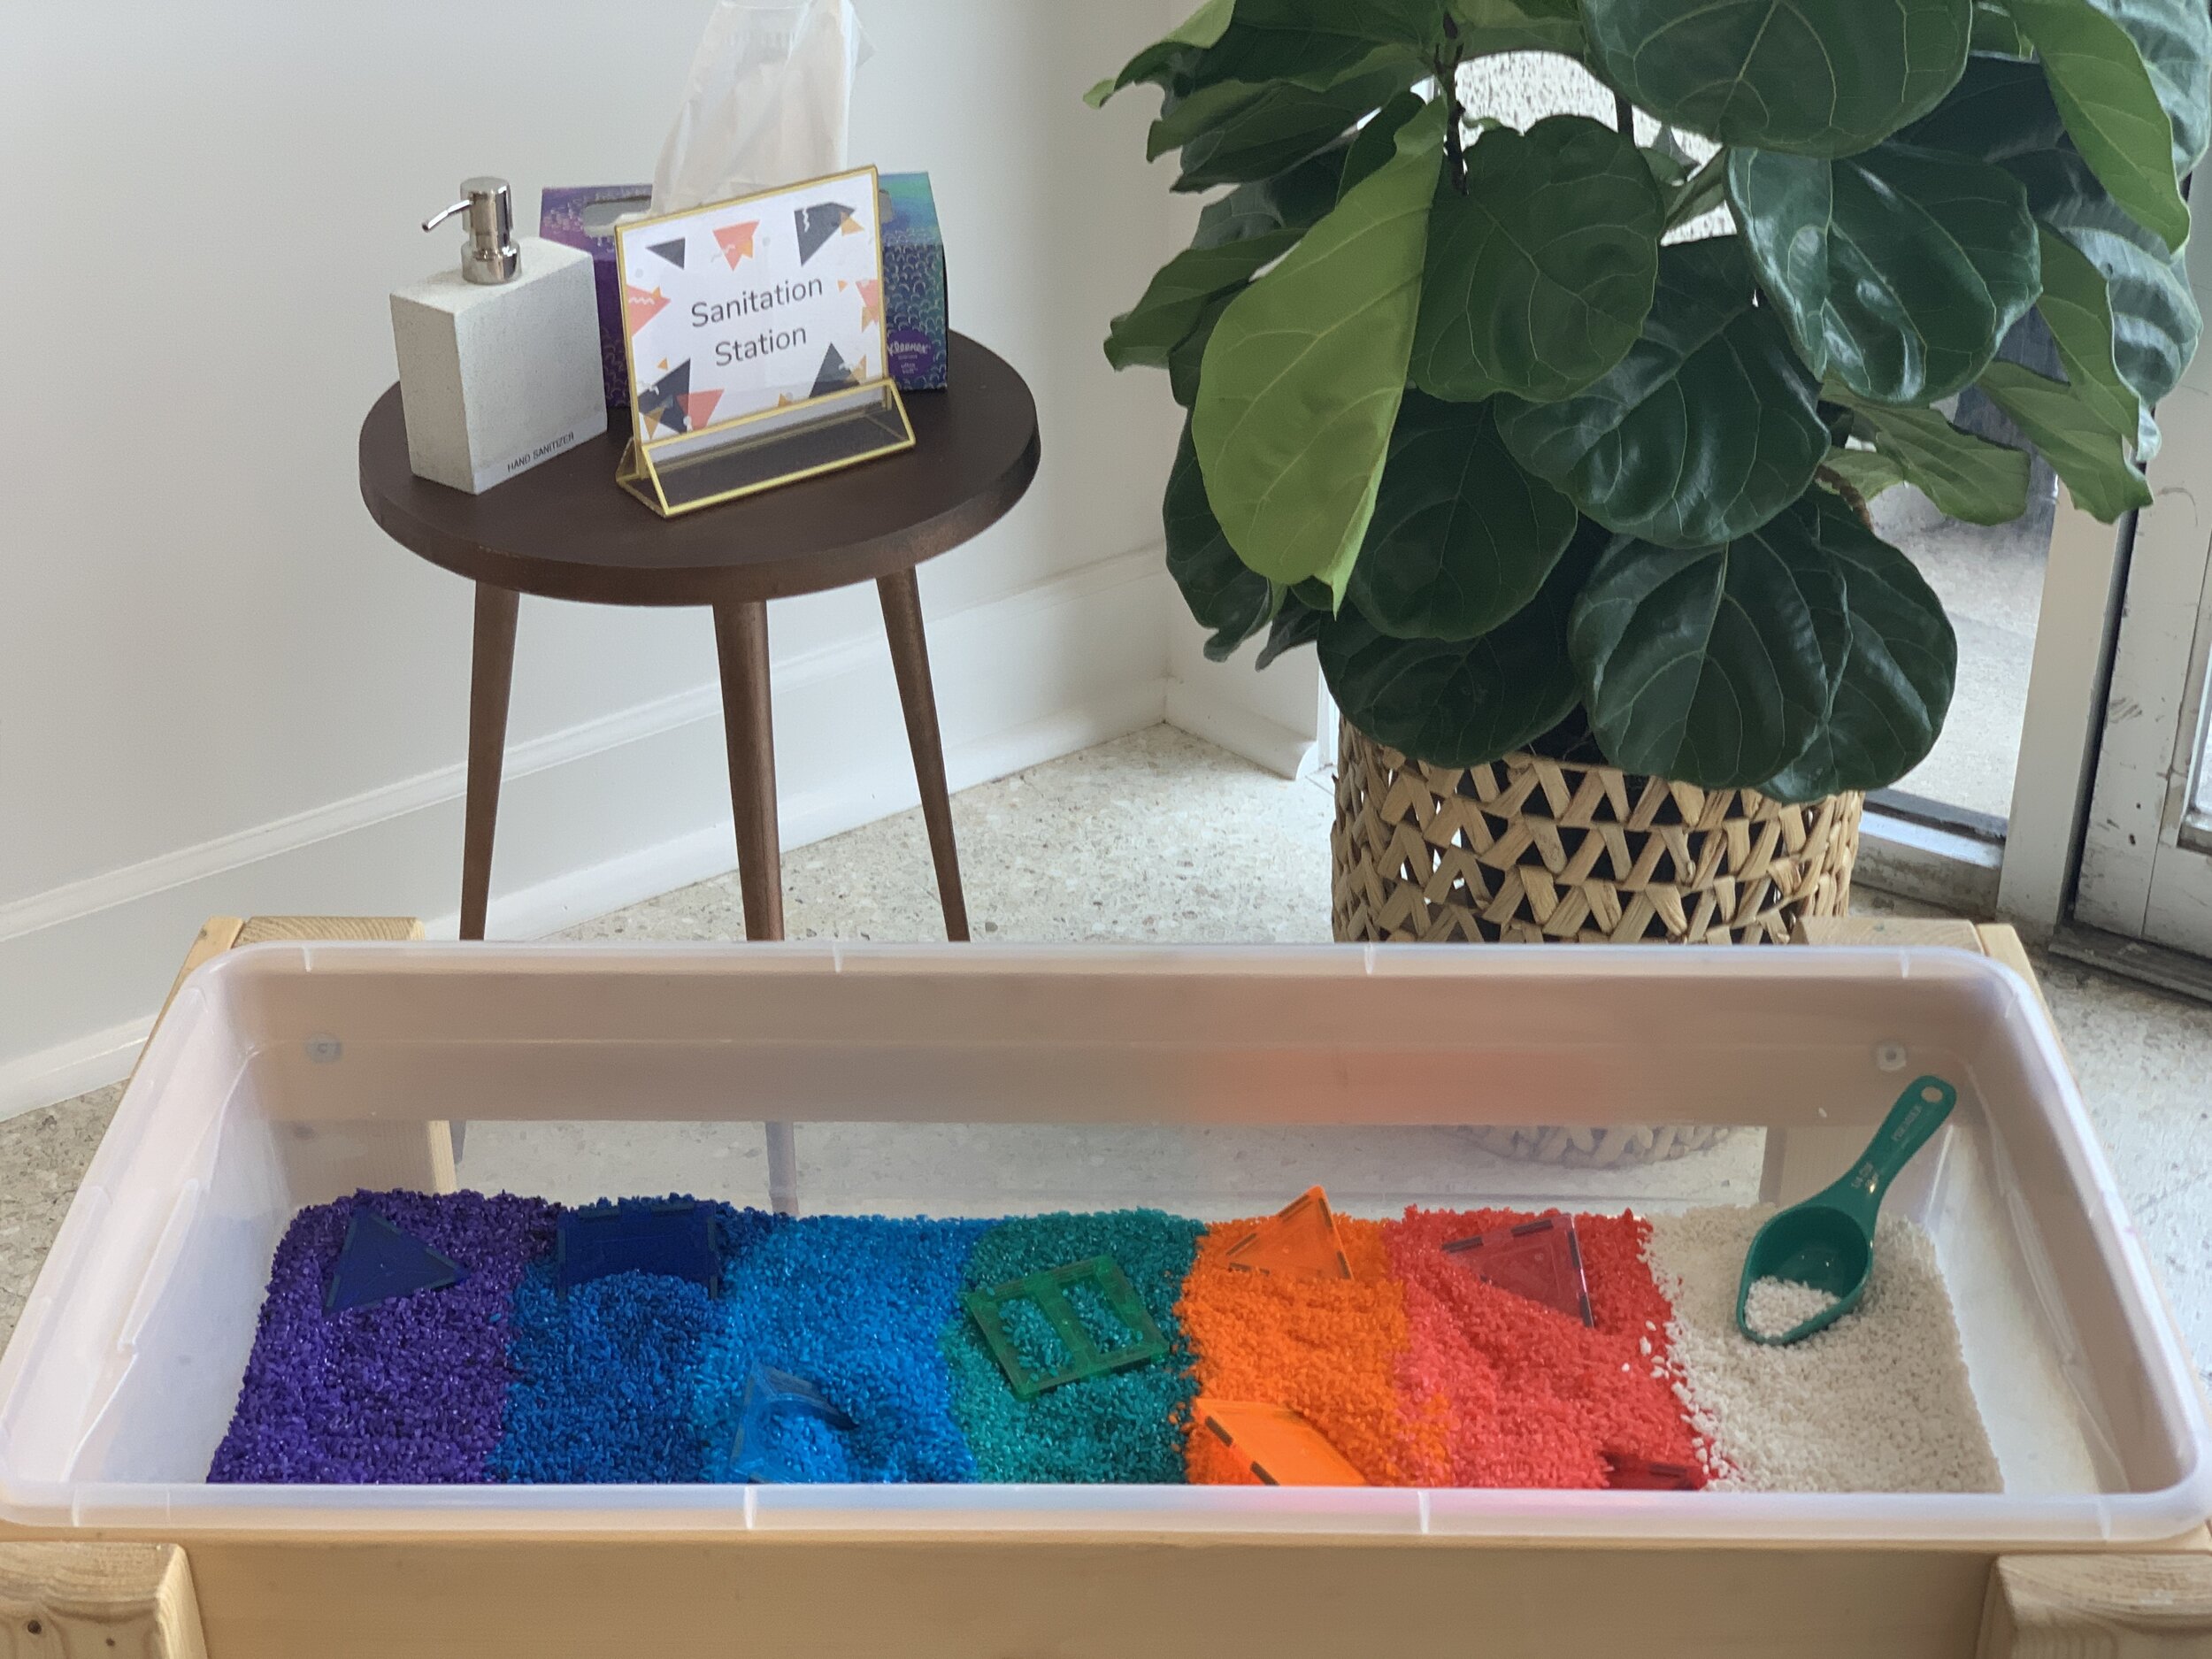
Our bins at Design Hive are a lightweight pine with a Sterilite storage bin, like this one on the left. So simple!

Toddler Sensory Play with Cloud Dough! Hoourrrssss of fun.
Filling the bin
There are so many possibilities for bin fillers. When working with children 2 and under, it’s best to use taste-safe or edible ingredients.
Our recommended edible fillers for children 2 and under:
Water
Ice
Oatmeal
Dry noodles
Cooked noodles
Cereals
Dried beans
Moon Sand/Cloud Dough (Oil and flour)
Tapioca beads. We used tapioca beads at our launch party in the spring and they were a hit!
A little gross to clean up, but nothing was stained…so... success!
Fillers for older children:
Water beads
Soapy water and water based paint- great making objects dirty and then giving them a bath!
Easter basket grass
Pom Poms
Cotton balls
Shredded paper
Kinetic sand


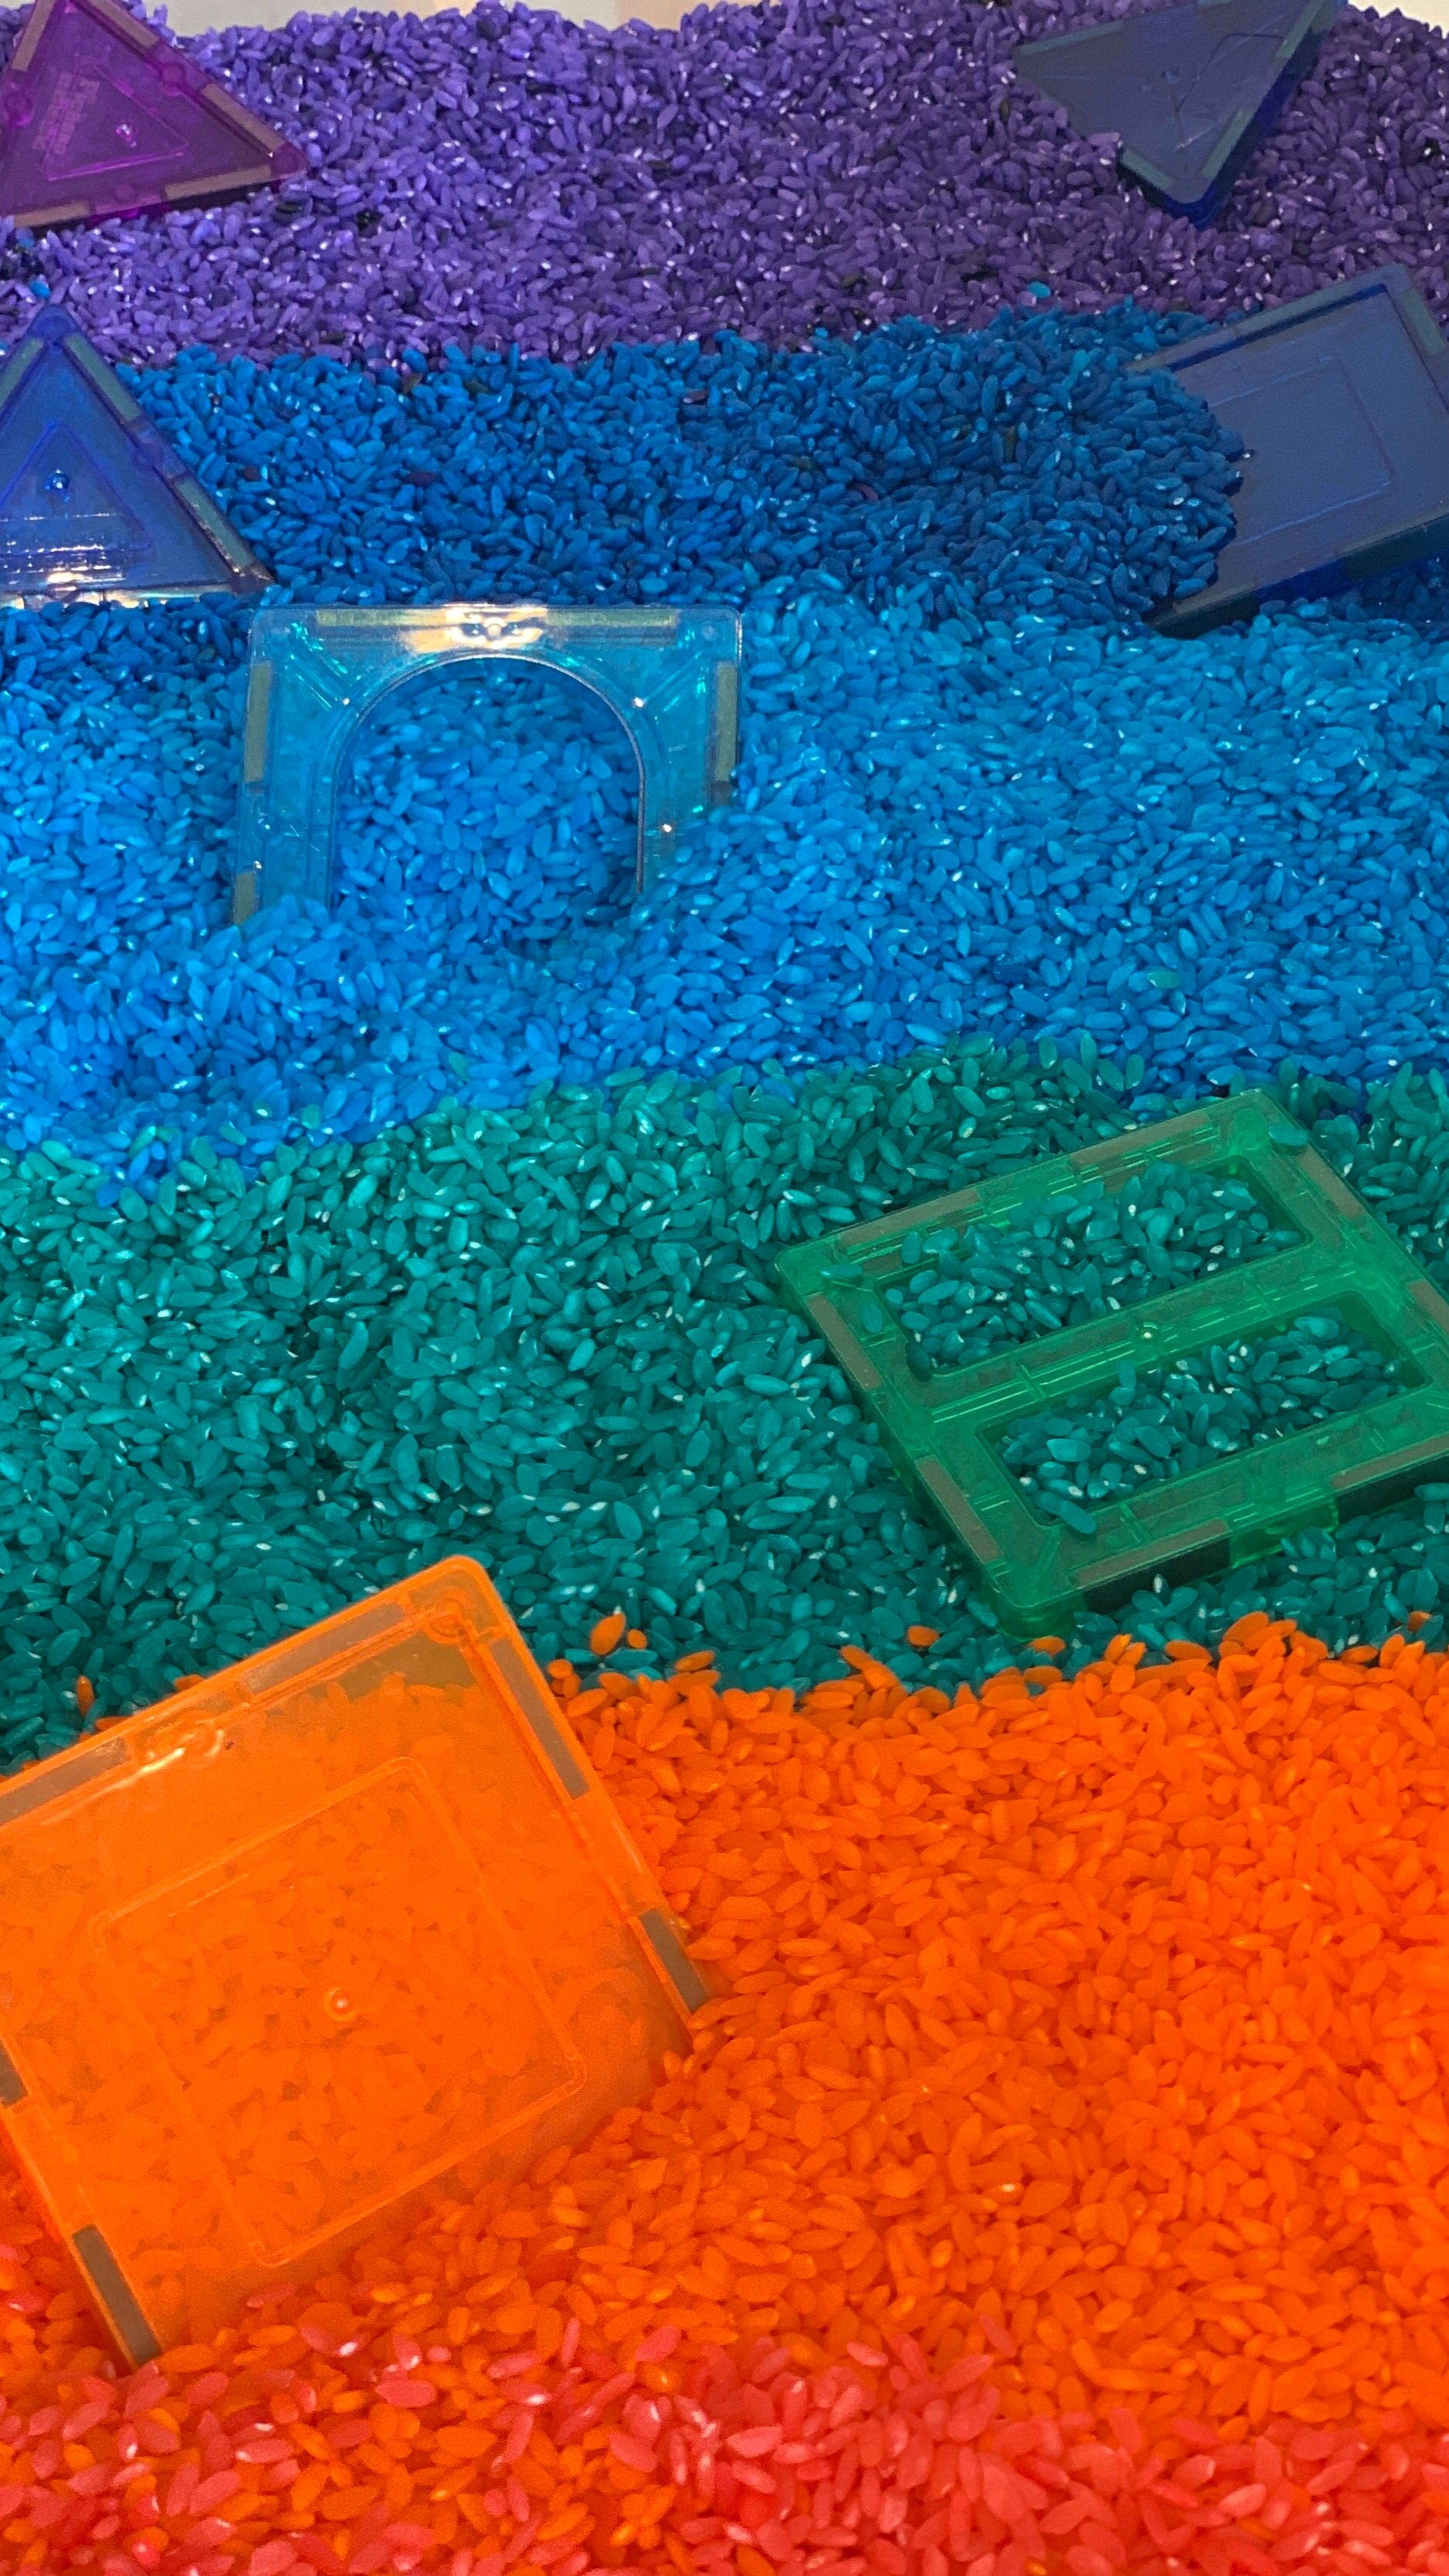
Our Favorite Filler… Rainbow Rice!
If you’ve never dyed rice before, I can tell you it is easy and fun!
(But is it therapeutic? Asking for a friend?) Yes. Yes it is.
Ingredients:
1 cup of medium or long grain white rice (I personally like medium grain because it's a little chubbier than long grain. It doesn’t look so much like dyed rice, and might be easier for little hands to grasp. This is all personal preference, though.)
½ tsp of vinegar Food coloring (I use Wilton gels, but you can use any kind you like!)
Ziploc bags or a reusable container. (I find the container to be easier to mix in, despite the clean up.)
Combine the rice, vinegar, and desired amount of food coloring in the container. I also add either food-grade essential oils or flavored extracts to cancel out the vinegar smell. I don’t know about you, but I’ve done so many bad science experiments using vinegar and mothballs. Blech. I don’t ever want to smell either of them again… Anyway, I use 2-3 drops of McCormick’s Mint Extract per batch- perfect!
Put the lid on the container and shake! If it’s on tight enough, have your kid do it! It’s so fun to watch the rice transform from plain white to gorgeous colors.
Lay the rice out flat- you can use a baking sheet, wax paper, cardboard, etc, and let it dry completely. I usually leave mine overnight just to be safe…
The best part is the color won’t come off on your hands! If you’re feeling really crazy, throw some glitter in there! I did! Then again, I’m still picking up tinsel and needles from 2017’s Christmas tree. Yes, I am THAT. PERSON.


Voila! The next day you have gorgeous colored rice perfect for dinosaurs, little people, mini skateboards, and magnet-tiles. Or maybe your kiddo likes to scoop, mix, pinch, sort, and count. That’s perfect. You’ll have so much fun.
Ok, That’s Great… But What IS Sensory Play and Why Should We Make That Mess?
“We see that the development of the hand is connected with the development of the intelligence in man and if we look at history, it is connected with the development of civilization.” -- Maria Montessori, The Absorbent Mind
We learn best and absorb information when it is deeply connected to one of our senses. How many of us can be instantly transported back to a very specific time by just hearing a certain song or experiencing a distinct smell? As children grow and develop, they use their senses to explore and make sense of the world around them.
Play is a child’s work.
In a child’s playtime, there should be plenty of opportunities for her to actively use her senses as she explores. Sensory play helps in building nerve connections in the brain’s pathways, leading to developments in language, fine and gross motor skills, and problem solving. We often think of sensory play as something that involves and develops our five senses, but fail to recognize two other aspects of development that sensory play improves: proprioception, which is defined as self-movement and body position awareness, and balance.


As a technology instructor, my most frustrating moments come when discussing keyboarding. Activities like keyboarding or playing an instrument require a great deal of muscle memory, stemming from fine motor skills. I can’t tell you how many parents assume that their children’s keyboarding will be fluid by age 8, when really eighth grade is when students should be typing between 20-30 words per minute. (More on this in another blog entry! Stay tuned!) How can we expect young students in elementary school to be experts in typing when many of them still struggle with pencil grips, zipping, and tying? Sensory play, like pinching, pouring, scooping, and lacing provides children with opportunities for motor skill development, which leads to highly developed hand-eye coordination in the future.